Builing a Loaded Beaver Snare ... step by step
Jun 27, 2009 21:39:48 GMT -5
Post by Deleted on Jun 27, 2009 21:39:48 GMT -5
Here are a series of pictures showing how to build a beaver snare (same methods apply to other species specific snares ... snares in general)
This process has been shown many times but I have included a lil tip to help those who tend to have trouble when it comes to loading a snare
For this example I'm using 1x19 - 5/64 cable with a slim lock
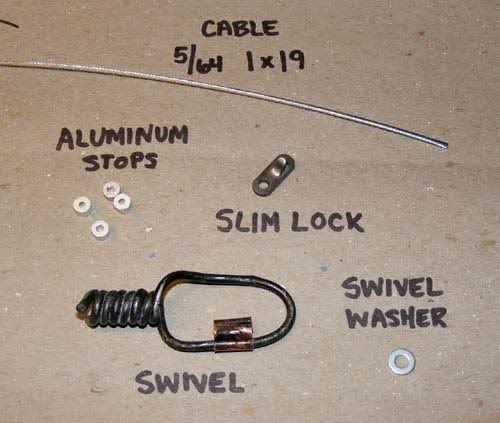
cut your cable to a 4 foot length (you can choose your preferred length)
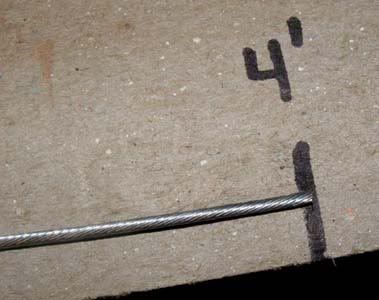
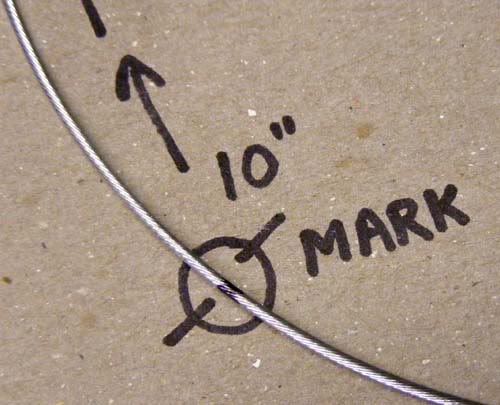
from one end measure your cable back and mark it at 10 inches using a sharpie marker (this mark will help reference where you will want to load your snare ... the 10 inches being approximately one third of my desired finished loop size ... 9 inch loop)
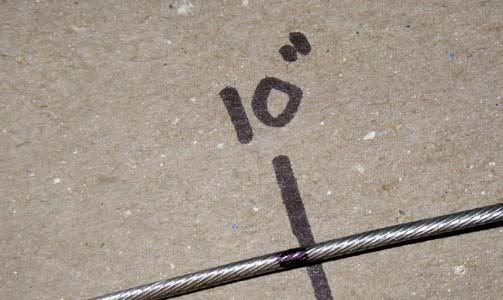
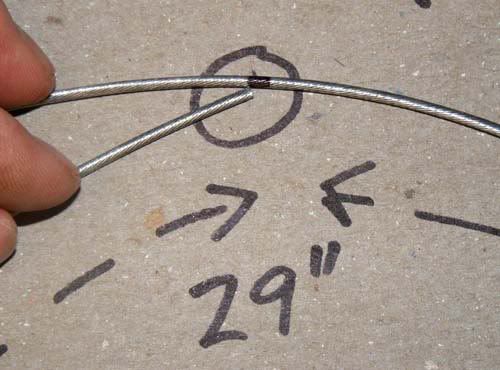
again, from the same end measure back and mark your cable at 29 inches ... this is the length you will need to make a 9 inch loop
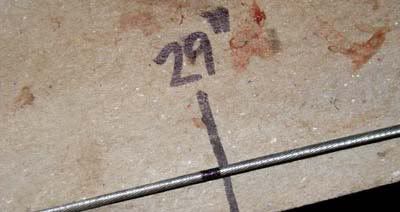
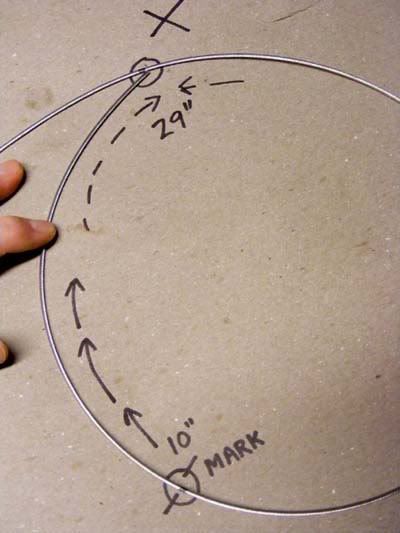
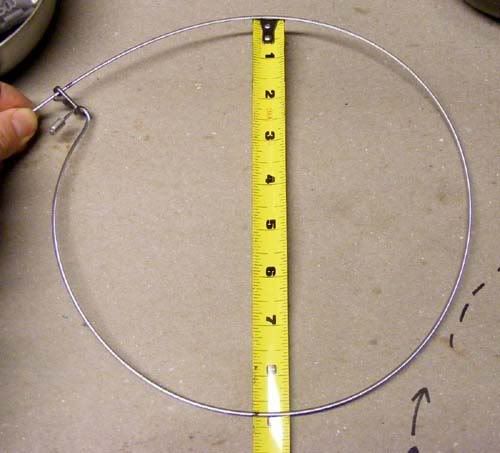
now form a loop from the end you were measuring from to your 29 inch mark ... you will notice it makes a perfect loop of your desired diameter
pic shows the 10 inch mark and the direction it should be
this pic very clearly shows the loop formed and where your reference marks are located
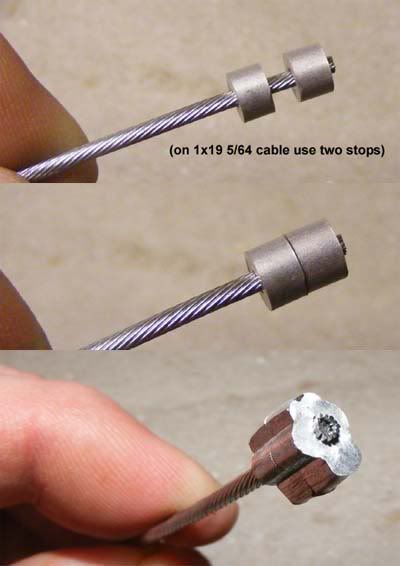
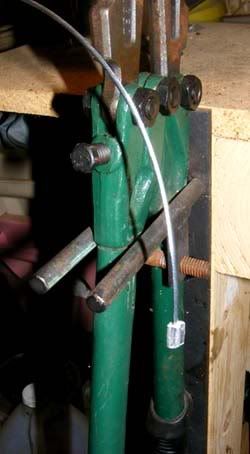
slide two stops onto the end of the cable ... crimp or hammer your stops (I recommend using two stops when using 1x19 5/64)
next, find the natural cast or "memory" of the cable ... now it's time to "load" the cable ... for this you will pull the cable around a 3/8" smooth rod etc. ... for my example I'll use the guide rod on my swagger jig ... since I only have two hands I was unable to take a photo of me actually doing this step ... but will try to explain it as clearly as I can ... holding the cable/crimped stop end in your fingers pull the cable around the 3/8 rod several times following the natural curve ... applying pressure from the stops to the mark you made at 10 inches ... heavier pressure nearer the stops and less towards your mark ... feathering it out ... this should leave you with a slight springy curve in the cable
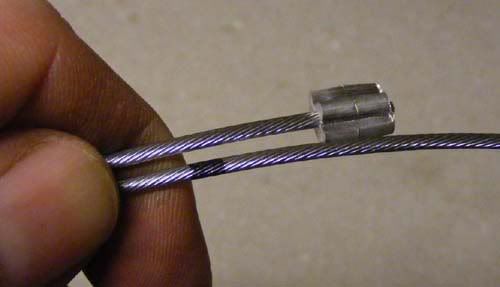
now with the cable in your hand form the cable to a loop ... being sure to keep everything in line you are ready to make a reverse bend in your cable (this is where your lock will hang)
---
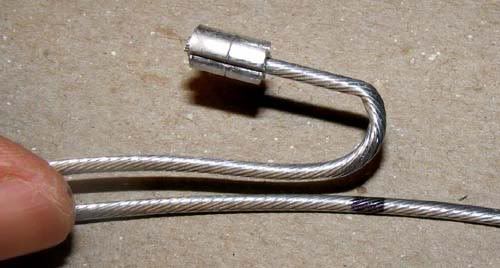
your reverse bend should look something like this
thread your lock onto cable ... (your state law may require a deer stop add it if needed)
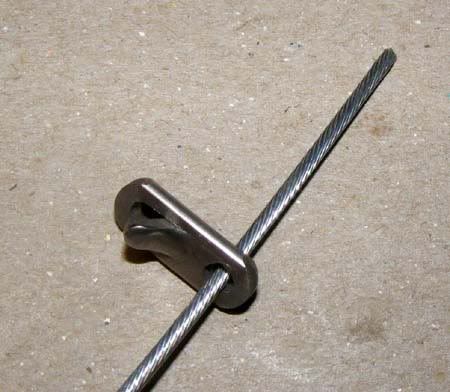
lock shown in reverse bend
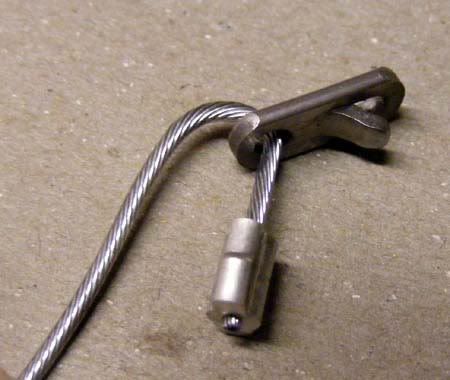
other end threaded through lock
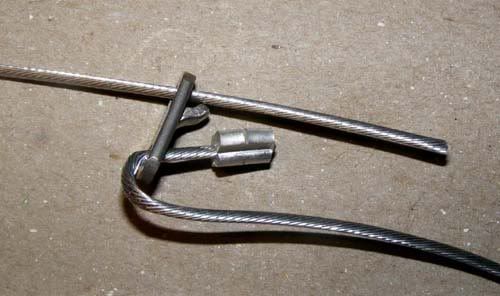
you now have a formed 9 inch loop (note the black "29 inch mark" next to the lock, the loop may be opened up to a larger diameter, I generally use a 9-10 inch if not smaller loop) ... we're almost finished
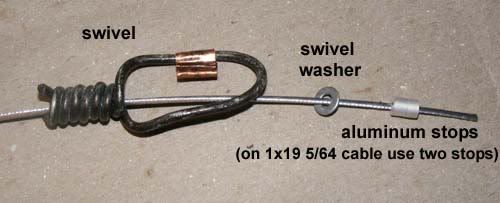
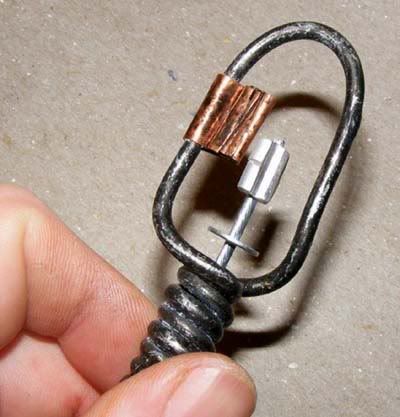
to finish up the snare we need to add a swivel ... this pic shows a swivel and washer threaded on then again two aluminum stops crimped onto the end ... (I do not use "whammies" but if you do make sure to thread one on prior to threading the swivel) I prefer a swivel on all of my snares, regardless of what type ... perhaps not always intended as a swivel but it is always a great anchoring point to connect my extension cable to ... you'll also notice that I fold/crimp a trap tag onto my swivels
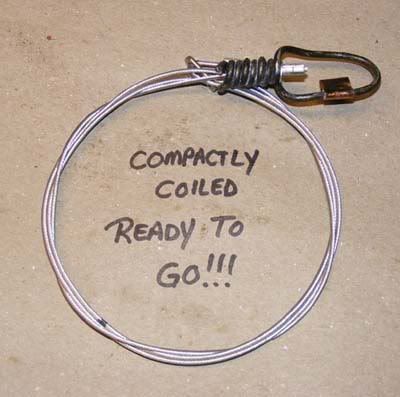
when finished and after dipped in Formula 1 (brown), I like to coil them fairly small ... they take up very little space, do not tangle and are easy to carry
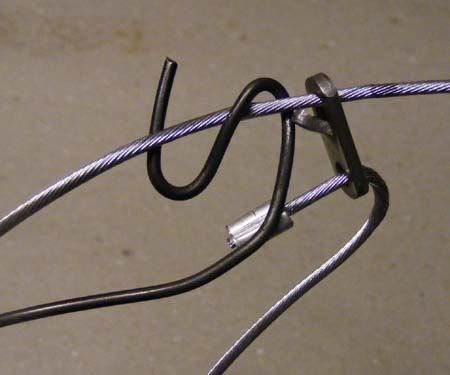
no whammies for me, I use, prefer and recommend the inverted S method using 14 gauge annealed wire to support snares
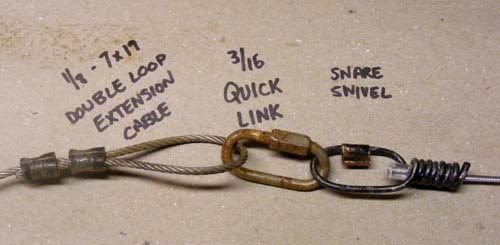
this is how I connect my snares to my extension cables ... simple and effective ... works for me
This process has been shown many times but I have included a lil tip to help those who tend to have trouble when it comes to loading a snare
For this example I'm using 1x19 - 5/64 cable with a slim lock

cut your cable to a 4 foot length (you can choose your preferred length)

from one end measure your cable back and mark it at 10 inches using a sharpie marker (this mark will help reference where you will want to load your snare ... the 10 inches being approximately one third of my desired finished loop size ... 9 inch loop)

again, from the same end measure back and mark your cable at 29 inches ... this is the length you will need to make a 9 inch loop

now form a loop from the end you were measuring from to your 29 inch mark ... you will notice it makes a perfect loop of your desired diameter

pic shows the 10 inch mark and the direction it should be

this pic very clearly shows the loop formed and where your reference marks are located

slide two stops onto the end of the cable ... crimp or hammer your stops (I recommend using two stops when using 1x19 5/64)

next, find the natural cast or "memory" of the cable ... now it's time to "load" the cable ... for this you will pull the cable around a 3/8" smooth rod etc. ... for my example I'll use the guide rod on my swagger jig ... since I only have two hands I was unable to take a photo of me actually doing this step ... but will try to explain it as clearly as I can ... holding the cable/crimped stop end in your fingers pull the cable around the 3/8 rod several times following the natural curve ... applying pressure from the stops to the mark you made at 10 inches ... heavier pressure nearer the stops and less towards your mark ... feathering it out ... this should leave you with a slight springy curve in the cable

now with the cable in your hand form the cable to a loop ... being sure to keep everything in line you are ready to make a reverse bend in your cable (this is where your lock will hang)

---
your reverse bend should look something like this

thread your lock onto cable ... (your state law may require a deer stop add it if needed)

lock shown in reverse bend

other end threaded through lock

you now have a formed 9 inch loop (note the black "29 inch mark" next to the lock, the loop may be opened up to a larger diameter, I generally use a 9-10 inch if not smaller loop) ... we're almost finished

to finish up the snare we need to add a swivel ... this pic shows a swivel and washer threaded on then again two aluminum stops crimped onto the end ... (I do not use "whammies" but if you do make sure to thread one on prior to threading the swivel) I prefer a swivel on all of my snares, regardless of what type ... perhaps not always intended as a swivel but it is always a great anchoring point to connect my extension cable to ... you'll also notice that I fold/crimp a trap tag onto my swivels


when finished and after dipped in Formula 1 (brown), I like to coil them fairly small ... they take up very little space, do not tangle and are easy to carry

no whammies for me, I use, prefer and recommend the inverted S method using 14 gauge annealed wire to support snares

this is how I connect my snares to my extension cables ... simple and effective ... works for me
